前面分析了解封装、解码以及解码后产生的音频视频原始数据PCM和YUV数据。今天说一下解封装的逆操作:封装。
什么是音视频封装?
其实很好理解,音视频封装其实就是对音频流和视频流进行了一次包装,加一上额外信息,方便后面使用。
比如:前面说过的pcm数据,如果要播放就要提供采样率、声道数、采样格式等参数,不然无法播放。而如果是封装好的音频文件,如mp3文件,则直接输入文件名就可以播放了。
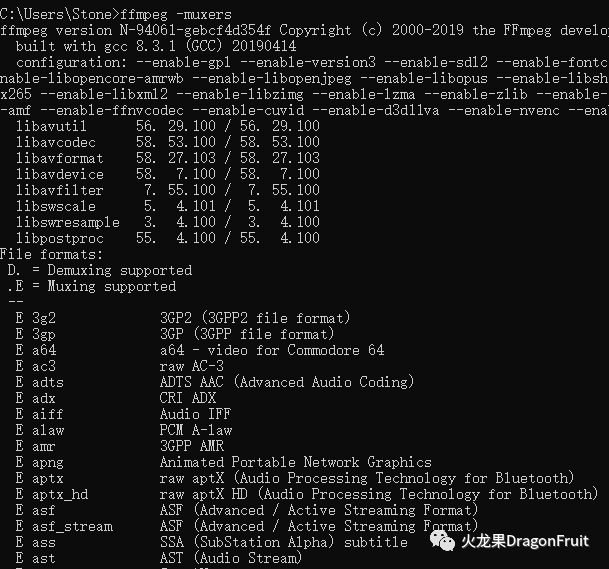
FFmpeg支持的封装格式muxer:
-
命令行:
ffmpeg -muxers

-
源码:
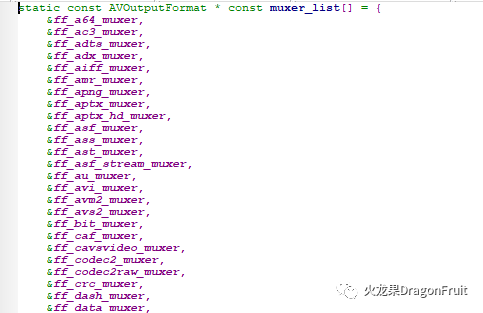
muxer_list.c: muxer_list指针数组

mxer对应的结构体:AVOutputFormat
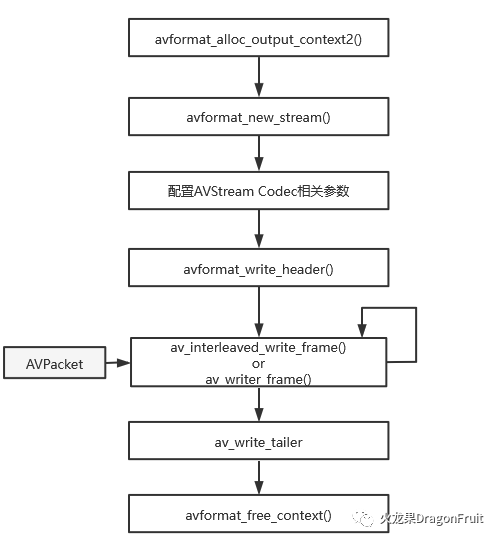
封装的基本流程:

-
分配输出AVFormatContext:
int avformat_alloc_output_context2(AVFormatContext **ctx, ff_const59 AVOutputFormat *oformat,const char *format_name, const char *filename);
-
为输入文件添加数据流AVStream:
AVStream表示一种音频流或视频流或字幕
AVStream *avformat_new_stream(AVFormatContext *s, const AVCodec *c)-
配置AVStream code相关参数:
设置AVStream的AVCodecParamters参数;
-
写入文件头:
int avformat_write_header(AVFormatContext *s, AVDictionary **options);此函数会调相应Muxer的write_header方法。
-
写入数据到输出文件:
av_interleaved_write_frame or av_write_frame
两者的区别在于前者会对输入的AVPacket进行缓存和重排,以保证输出到文件的AVPacket是按dts递增的。后得则没有进行缓存,而且需要调用者自己重排。
-
写入文件尾:
int av_write_trailer(AVFormatContext *s);此函数会调用muxer的writer_tailer方法。
-
释放AVFormatContext:
void avformat_free_context(AVFormatContext *s)注意:写入文件文件头API的前缀是avformat_,而写入数据和文件尾则av_。
官方Demo分析:
remuxing.c:
此例子是先对输入文件进行解封装,然后再直接重新封装,未进行解码和编码 操作。
解封装操作前面的文章已经介绍了,这里只分析封装部分。
int main(int argc, char **argv){AVOutputFormat *ofmt = NULL;AVFormatContext *ifmt_ctx = NULL, *ofmt_ctx = NULL;AVPacket pkt;const char *in_filename, *out_filename;int ret, i;int stream_index = 0;int *stream_mapping = NULL;int stream_mapping_size = 0;if (argc < 3) {printf("usage: %s input output\n""API example program to remux a media file with libavformat and libavcodec.\n""The output format is guessed according to the file extension.\n""\n", argv[0]);return 1;}in_filename = argv[1];out_filename = argv[2];if ((ret = avformat_open_input(&ifmt_ctx, in_filename, 0, 0)) < 0) {fprintf(stderr, "Could not open input file '%s'", in_filename);goto end;}if ((ret = avformat_find_stream_info(ifmt_ctx, 0)) < 0) {fprintf(stderr, "Failed to retrieve input stream information");goto end;}av_dump_format(ifmt_ctx, 0, in_filename, 0);//分配输出的AVFormatContext上下方avformat_alloc_output_context2(&ofmt_ctx, NULL, NULL, out_filename);if (!ofmt_ctx) {fprintf(stderr, "Could not create output context\n");ret = AVERROR_UNKNOWN;goto end;}stream_mapping_size = ifmt_ctx->nb_streams;stream_mapping = av_mallocz_array(stream_mapping_size, sizeof(*stream_mapping));if (!stream_mapping) {ret = AVERROR(ENOMEM);goto end;}ofmt = ofmt_ctx->oformat;for (i = 0; i < ifmt_ctx->nb_streams; i++) {AVStream *out_stream;AVStream *in_stream = ifmt_ctx->streams[i];AVCodecParameters *in_codecpar = in_stream->codecpar;if (in_codecpar->codec_type != AVMEDIA_TYPE_AUDIO &&in_codecpar->codec_type != AVMEDIA_TYPE_VIDEO &&in_codecpar->codec_type != AVMEDIA_TYPE_SUBTITLE) {stream_mapping[i] = -1;continue;}stream_mapping[i] = stream_index++;//为输出添加音视频流AVStremout_stream = avformat_new_stream(ofmt_ctx, NULL);if (!out_stream) {fprintf(stderr, "Failed allocating output stream\n");ret = AVERROR_UNKNOWN;goto end;}//配置AVStream的AVCodecParameters,这里直接用的输入文件相应流的参数ret = avcodec_parameters_copy(out_stream->codecpar, in_codecpar);if (ret < 0) {fprintf(stderr, "Failed to copy codec parameters\n");goto end;}out_stream->codecpar->codec_tag = 0;}av_dump_format(ofmt_ctx, 0, out_filename, 1);if (!(ofmt->flags & AVFMT_NOFILE)) {ret = avio_open(&ofmt_ctx->pb, out_filename, AVIO_FLAG_WRITE);if (ret < 0) {fprintf(stderr, "Could not open output file '%s'", out_filename);goto end;}}//写入文件头ret = avformat_write_header(ofmt_ctx, NULL);if (ret < 0) {fprintf(stderr, "Error occurred when opening output file\n");goto end;}while (1) {AVStream *in_stream, *out_stream;ret = av_read_frame(ifmt_ctx, &pkt);if (ret < 0)break;in_stream = ifmt_ctx->streams[pkt.stream_index];if (pkt.stream_index >= stream_mapping_size ||stream_mapping[pkt.stream_index] < 0) {av_packet_unref(&pkt);continue;}pkt.stream_index = stream_mapping[pkt.stream_index];out_stream = ofmt_ctx->streams[pkt.stream_index];log_packet(ifmt_ctx, &pkt, "in");/* copy packet */pkt.pts = av_rescale_q_rnd(pkt.pts, in_stream->time_base, out_stream->time_base, AV_ROUND_NEAR_INF|AV_ROUND_PASS_MINMAX);pkt.dts = av_rescale_q_rnd(pkt.dts, in_stream->time_base, out_stream->time_base, AV_ROUND_NEAR_INF|AV_ROUND_PASS_MINMAX);pkt.duration = av_rescale_q(pkt.duration, in_stream->time_base, out_stream->time_base);pkt.pos = -1;log_packet(ofmt_ctx, &pkt, "out");//写入AVPacket数据ret = av_interleaved_write_frame(ofmt_ctx, &pkt);if (ret < 0) {fprintf(stderr, "Error muxing packet\n");break;}av_packet_unref(&pkt);}//写入文件尾av_write_trailer(ofmt_ctx);end:avformat_close_input(&ifmt_ctx);/* close output */if (ofmt_ctx && !(ofmt->flags & AVFMT_NOFILE))avio_closep(&ofmt_ctx->pb);//释放输出AVFormatContext上下文。avformat_free_context(ofmt_ctx);av_freep(&stream_mapping);if (ret < 0 && ret != AVERROR_EOF) {fprintf(stderr, "Error occurred: %s\n", av_err2str(ret));return 1;}return 0;}
一个小问题:
上面官方例子中音频数据和视频数据是交叉写入的,如果先写入视频,再写入音频,是不是也可以呢?
曾经有同事问过这个问题,他说验证过没有问题,音视频是同步的。如果你上网搜索的话,同样有文章专门做过试验说是可以的。
那真的没有问题吗?
其实这个跟封装格式有关,有的格式音视频数据是交叉存储的,比如TS流就会有问题。如果音视频数据是分开存储的,比如mp4,则没有问题。
具可以通过修改ffmpeg源码中的muxing.c来进行验证:
首先将宠定义STEADM_duration 由10.0改为1000.0 此值代表写入的音视频数据的总时长。
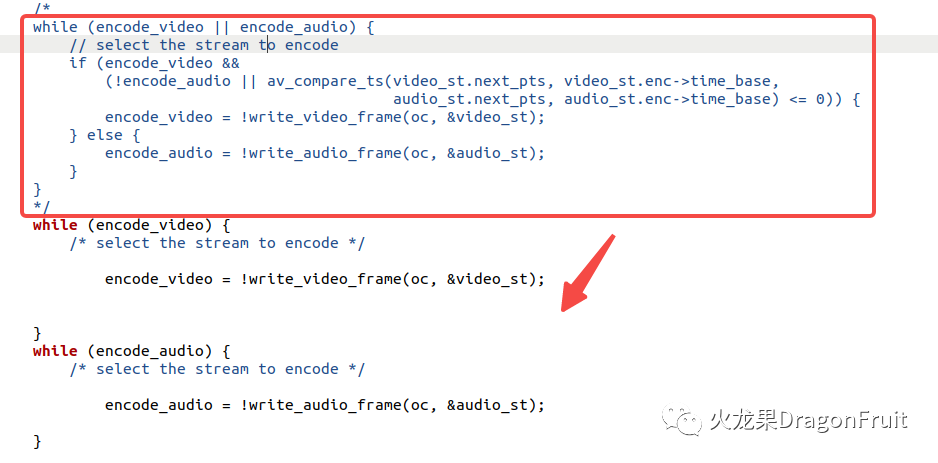
紧接将原有逻辑修改为先写视频,再写音频,如下所示:

红框表示原来的逻辑,下面两个while循环则分别用于写入视频和音频。
执行两次程序分别输出ts流和mp4,然后用ffplay进行播放验证:
mp4播放正常,但ts流播放只有画面,没有声音。
文章评论