上一章我们借助插件的力量,做了个小程序调色盘 Demo。
但光有个调色盘也没用啊,还得把用户选取的颜色给展示出来。
本章就来完成这个功能。
代码编写
继续在 index.vue 上做文章。
老规矩,首先是模板部分的代码:
<!-- pages/index/index.vue -->

<template>
  <view class="container padding-10">
    <!-- 展示当前颜色的画布 -->
    <view class="container canvas" :style="canvasStyle" @click="onClickCanvas">
      <view :style="canvasHexStyle">{{canvasHex}}</view>
    </view>
    <!-- 调色盘 -->
    <button @click="openPicker" type="default" size="mini">打开色盘</button>
    <t-color-picker ref="colorPicker" :color="canvasColor" @confirm="confirmPicker"></t-color-picker>
  </view>
</template>

...
其中的调色盘代码和前章基本是一样的,增加的是这个画布:
-
画布需要根据调色盘选定的颜色,动态改变自身的颜色,因此需要用 :style将自身颜色绑定到canvasStyle函数的返回值上。canvasStyle是计算属性,其返回值是调色盘所选取的颜色。 -
{{canvasHex}}同样是计算属性,用于显示颜色的 Hex 码(16进制颜色码)。 -
@click="onClickCanvas"绑定了画布的点击事件,用户可点击画布直接将 Hex 码复制到手机的剪切板中。
Hex 码是 RGB 码的16进制表示形式,举个例子,RGB 为 (01,02,03) 时,转化为 Hex 就是 #010203。详细内容请自行了解。
写好模板之后,然后来写 javascript 脚本:
// pages/index/index.vue

...

<script>
  export default {
    data() {
      return {
        // 当前选择的 rgb 颜色
        canvasColor: {
          r: 255,
          g: 193,
          b: 7,
          a: 1
        },
      };
    },
    methods: {
      // 打开色盘
      openPicker(item) {
        this.$refs.colorPicker.open();
      },
      // 色盘点击确定后
      // 将选取的颜色赋值给 canvasColor 状态
      confirmPicker(e) {
        this.canvasColor = e.rgba
      },
      // 将 rgb 转换为 hex
      rgbToHex(rgb) {
        let hex = [rgb.r.toString(16), rgb.g.toString(16), rgb.b.toString(16)];
        hex.map(function(str, i) {
          if (str.length == 1) {
            hex[i] = '0' + str;
          }
        });
        return hex.join('');
      },
      // 调用 uniapp 提供的接口
      // 将 hex 复制到设备剪贴板
      onClickCanvas() {
        uni.setClipboardData({
          data: this.canvasHex,
        });
      }
    },
    computed: {
      // 每当 canvasColor 发生变化时
      // 设置 canvas 的颜色
      canvasStyle() {
        return `background: #${this.rgbToHex(this.canvasColor)}`
      },
      // 设置 canvas 的文本颜色
      // 使其根据 hex 颜色的深浅自动变化
      canvasHexStyle() {
        for (let key in this.canvasColor) {
          if (this.canvasColor[key] >= 130) {
            return "color: black"
          }
        }
        return "color: white"
      },
      // 设置 canvas 的 hex 文本
      canvasHex() {
        return "#" + this.rgbToHex(this.canvasColor)
      },
    },
  };
</script>

...
代码量看似很大,但实际上新增的函数都很简单,一两句注释就把函数功能说清楚了。
这些函数被分为了 methods 和 computed 两类。methods 中的方法需要通过某些事件、动作才能触发运行,比如用户点击了按钮。而 computed 中的方法被称为计算属性,它会实时监听自身所依赖的状态,一旦发生改变,将自动更新返回值并将其反应到 UI 界面中。
比如这个最核心的计算属性 canvasStyle() ,它所依赖的状态是 canvasColor ,用户用调色盘选取颜色后, canvasColor 通过 confirmPicker() 函数发生了改变,计算属性返回值立即变化,最终就是画布的颜色得到自动更新,变得和用户选取的颜色一致了。
最后是样式:
/* pages/index/index.vue */

...

<style scoped>
  .container {
    display: flex;
    flex-direction: column;
    align-items: center;
    justify-content: center;
  }

  .padding-10 {
    padding: 10px;
  }

  .canvas {
    height: 80px;
    width: 100%;
    margin-bottom: 10px;
    border-radius: 10px;
    border-color: #484848;
    border-style: dashed;
  }
</style>
主要设置了元素的布局形式、画布的边框和外观等。
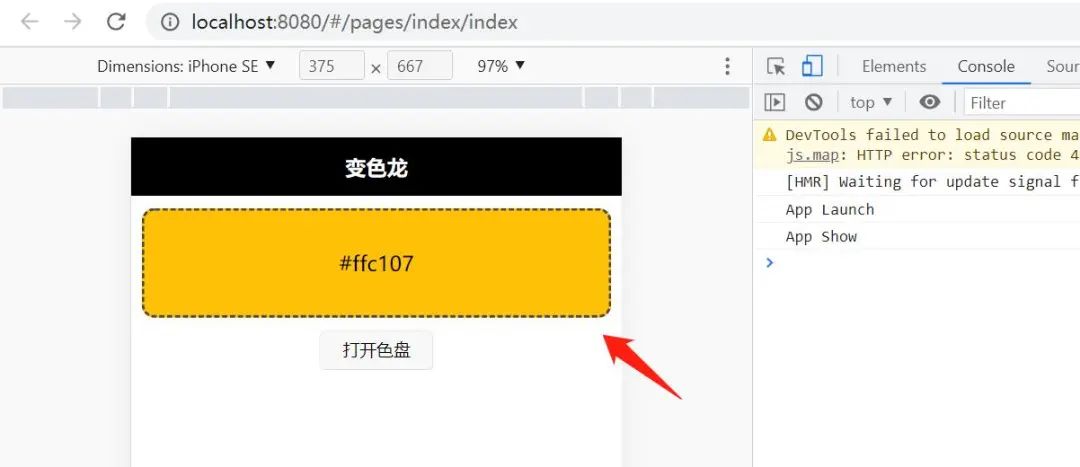
保存好修改后的代码,返回 Chrome 的模拟器看看:
这个漂亮的橘黄色是 canvasColor 所提供的默认值。
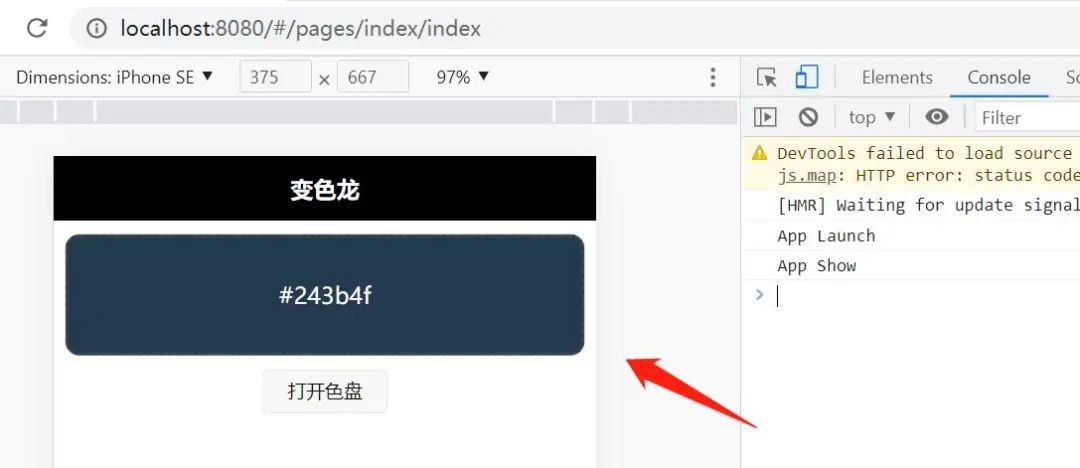
点击打开色盘按钮,随便更换一种颜色并点击确认后:
注意看,因为你选取的画布颜色较深,连文本颜色也变为白色了,神奇吧。
这是因为
canvasHexStyle()根据画布颜色的深浅,更新了文本的颜色。
组件入门
除了调色盘、画布等核心要素外,小程序通常还需要适当的区域标题,将不同的内容稍加隔离。
考虑到标题会在不同的地方用到,因此可以将其自定义为组件以便重复利用。
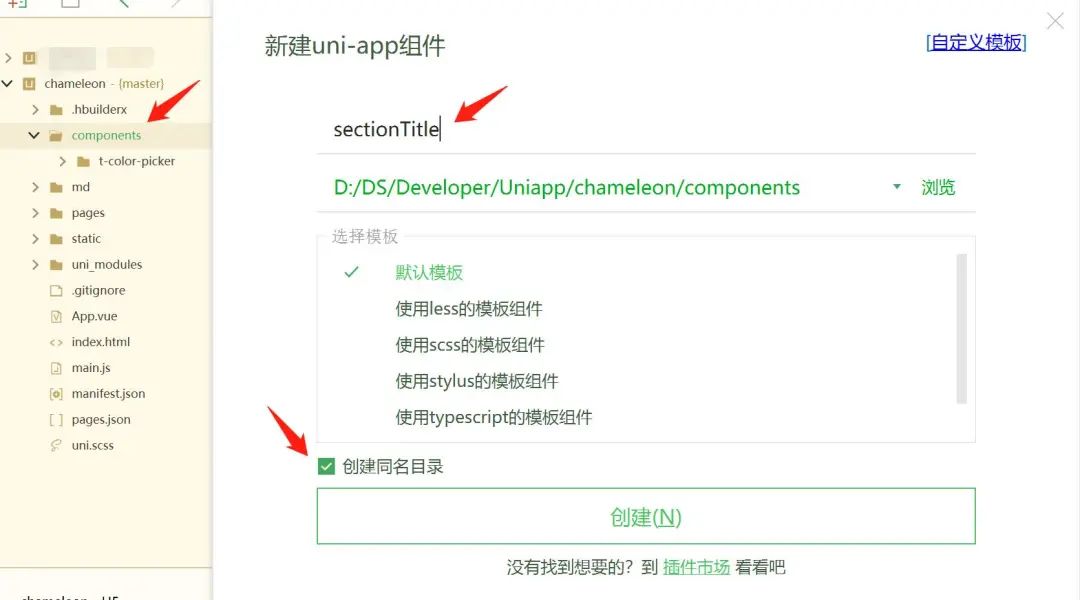
首先在目录结构中右键点击 components 目录路径,新建组件:
创建名叫sectionTitle的组件。注意勾选创建同名目录,以满足 uniapp 自动导入组件的规范。
接下来将 components/sectionTitle/sectionTitle.vue 代码修改如下:
<!-- components/sectionTitle/sectiontTitle.vue -->

<template>
  <view class="content">
    <view class="title"><text class="number">{{num}}</text><text>{{title}}</text></view>
    <view class="underline"></view>
  </view>
</template>

<script>
  export default {
    name: "sectionTitle",
    props: {
      num: {
        type: String,
      },
      title: {
        type: String,
      },
    },
  }
</script>

<style scoped>
  .content {
    display: flex;
    flex-direction: column;
    padding-top: 5px;
  }

  .title {
    color: #c5c5c5;
    font-size: 16px;
    font-style: italic;
    font-weight: 600;
    padding-bottom: 5px;
  }

  .underline {
    width: 40px;
    height: 4px;
    background-color: #ebebeb;
    margin-bottom: 20px;
  }

  .number {
    font-size: 30px;
  }
</style>
代码中 props 即为需要从组件外部传递进来的参数,包括标题文字 title 和序号 num 。
这样就写好了一个简单的自定义组件了。
使用起来也很简单,像这样:
<!-- pages/index/index.vue -->

<template>
  <view class="padding-10">
    <sectionTitle num="01" title="当前色彩"></sectionTitle>

    <view class="container">
      <!-- 展示当前颜色的画布 -->
      ...
      <!-- 色盘组件 -->
      ...
    </view>
  </view>
</template>

...
注意看 props 是如何对应传递的。
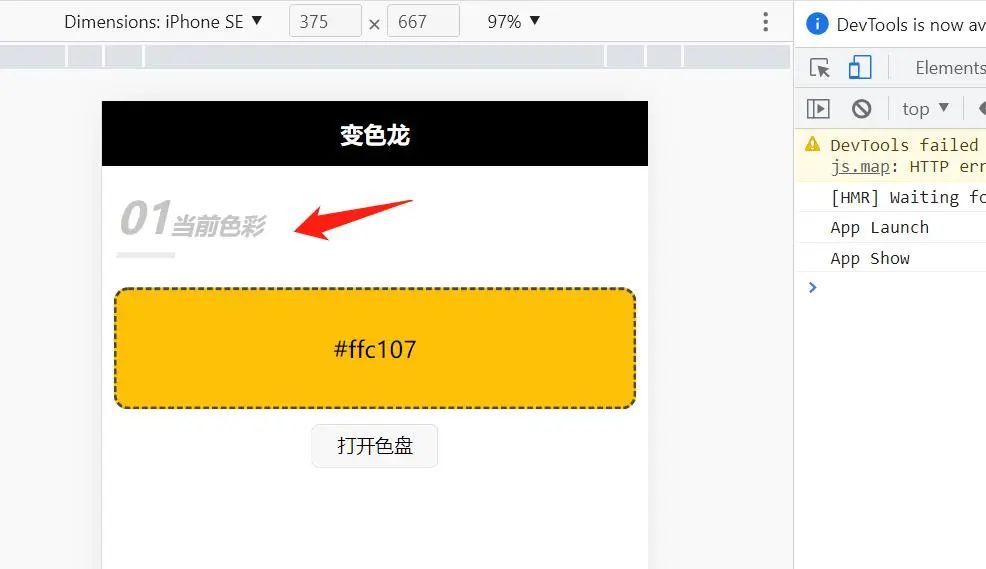
保存并刷新试试:
结语
调色盘作为小程序最基本的功能就完成了。
下一章节将继续完善它,使得用户可以在 RGB 和 Hex 色码自由转换,并且照顾移动端操作的便利性。


文章评论