
1.准备基础镜像
docker pull debian:10-slimdocker run -itd --name=wiki --net=host debian:10-slim bash
2. 安装
confluence 需要 java 环境运行
2.1 安装Open JDK 8
apt updateapt install apt-transport-https ca-certificates wget dirmngr gnupg software-properties-common
wget -qO - https://adoptopenjdk.jfrog.io/adoptopenjdk/api/gpg/key/public | apt-key add -
add-apt-repository
apt updateapt install adoptopenjdk-8-hotspotjava -version
2.2 新启一个容器安装 PostgreSql
作为 confluence 的数据存储
docker pull postgres:10.0
docker run --name postgres -e POSTGRES_PASSWORD=postgres -p 5432:5432 -d postgres:10.0
docker exec -it postgres bash
psql -h localhost -p 5432 -U postgres\lCREATE DATABASE confluence WITH OWNER postgres;\q
2.3 安装 confluence
返回到 wiki 容器中,下载 confluence 并安装
cd /usr/srcwget https://downloads.atlassian.com/software/confluence/downloads/atlassian-confluence-6.12.1-x64.bin
chmod +x atlassian-confluence-6.12.1-x64.bin./atlassian-confluence-6.12.1-x64.bin
安装过程中我们需要按几次回车来确定默认安装位置。
安装完成,访问 ip:8090 即可


3. 破解 Confluence
从刚刚安装的目录中导出jar进行破解:
mv /opt/atlassian/confluence/confluence/WEB-INF/lib/atlassian-extras-decoder-v2-x.x.x.jar /opt/atlassian-extras-2.4.jar
将 atlassian-extras-2.4.jar 下载到本地,
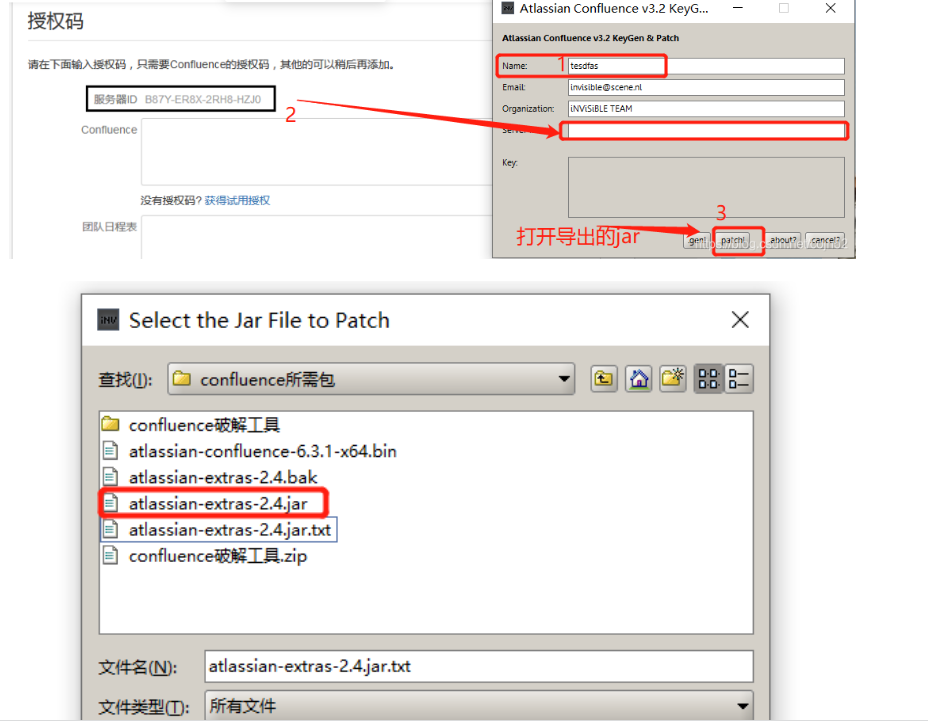
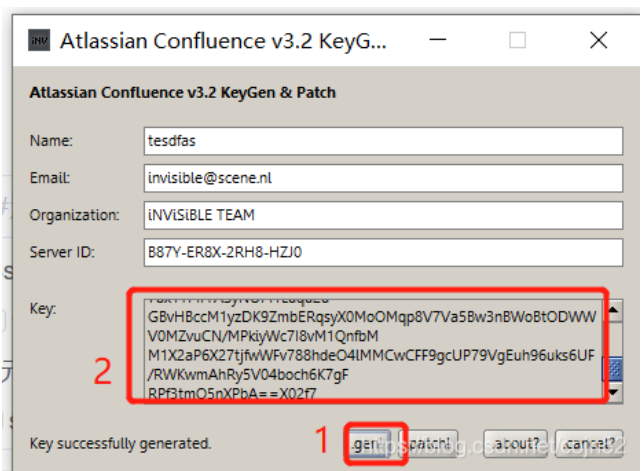
运行破解器 confluence_keygen.jar ,(需要 jdk 环境,使用 java -jar 命令启动)
操作如下图所示:


运行生成授权码,此时别着急粘贴到刚刚的web页面中,还有后续操作:
接下来我们把刚刚导出来改名并使用注册机注册的jar包导回 confluence 安装目录中,并把atlassian-extras-2.4.jar名字改为原来的名字。
上传破解后jar包到/opt/atlassian/confluence/confluence/WEB-INF/lib,并重命名atlassian-extras-decoder-v2-x.x.x.jar
上传mysql驱动/opt/atlassian/confluence/confluence/WEB-INF/lib,并重启confluence:
sh /opt/atlassian/confluence/bin/stop-confluence.shsh /opt/atlassian/confluence/bin/start-confluence.sh
我们登录web页面:localhost:8090,复制授权码并粘贴,即可。
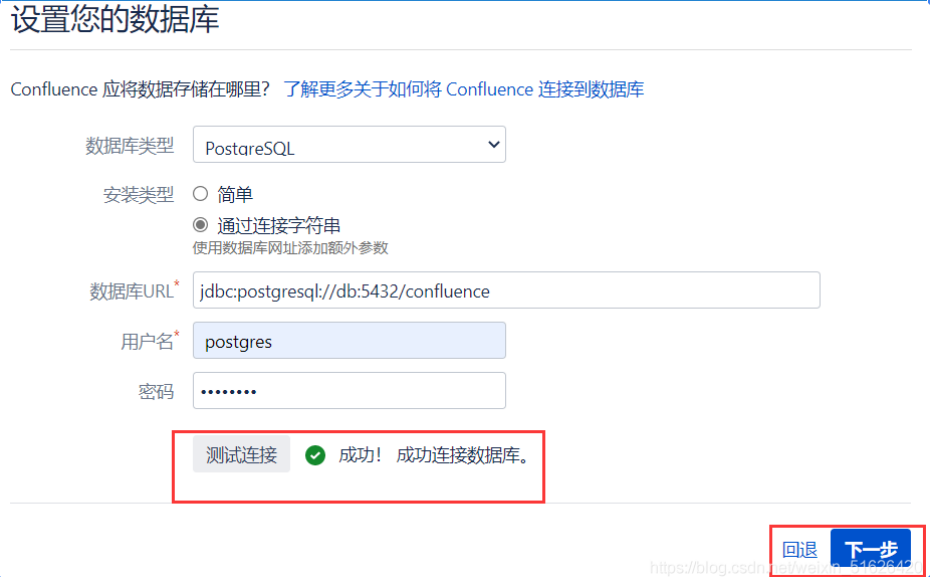
4. 连接 PostgreSql
下图中 数据库url 为:jdbc:postgresql://localhost:5432/confluence


文章评论