来自:掘金,作者:可爱子 链接:https://juejin.cn/post/6953882449235410951
我们的项目是前端用vue,服务端用node.js,这个excel导出我们已经用了一年,我们目前用到的无非是图片导出,文本导出,调调excel单元格距离等.
这个node端的封装是经过同事不断的review(感谢同事),俺不断的修改优化后的代码,当时也是我第一次接触node.js,只想告诉你,用它,稳稳的!
node.js服务端代码
1.拿到需要导出的数据之后如何使用(假数据模拟,下面是页面)

 constructor(prop) {
    super(prop)
    // 定义excel头部数据
    this.header = [
      { header: '游戏', key: 'gameInfo', width: 30 },
      { header: '宣传图片', key: 'image', width: 15 },
      { header: '游戏详情页', key: 'path', width: 15 },
      { header: '状态', key: 'activeStatus', width: 30 },
      { header: '排序权重', key: 'sort', width: 30 },
      { header: '最近编辑时间', key: 'updateTime', width: 30 },
      { header: '最近编辑人', key: 'operatorName', width: 30 },
    ]
  }
 /**
   * 导出游戏管理数据
   */
  async exportGameEndGameManage() {
    const { list } = await this.commonGameEndGameManage(true)
    console.log(list, 'list')
    const baseExcelInfo = {
      data: list,
      filename: 'gameManageList',
      header: this.header,
      sheetName: '游戏管理列表',
      imageKeys: [
        {
          name: 'image',
          imgWidth: '100',
          imgHeight: '100',
        },
      ],
    }
    await this.service.common.exportFile.exportExcel(baseExcelInfo)
  }
复制代码
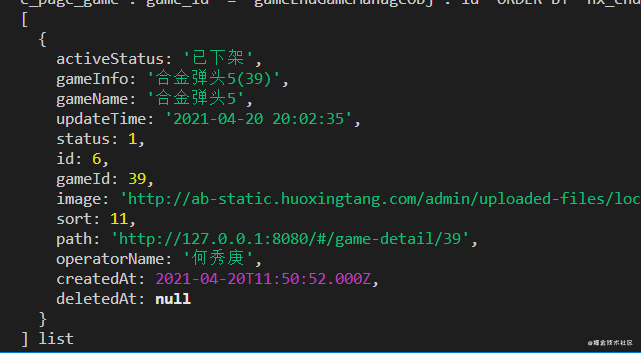
list就是拿到的数据,打印如下
baseExcelInfo用来定义基本的参数
data 表示的是excel的数据来源
filename 是文件名(但是前端的excel导出会进行覆盖)
header表示的是表格的头部
sheetName表示的是excel的表名
imageKeys:图片的信息:字段名称,图片的宽高,但是只要有图片,name必须设

很重要的一点就是,假设从表里面的数据返回的status是1,那么我肯定导出的不能1,应该是对应的一个中文,所以在导出前,应该进行处理,这个处理应该是在服务端来做,而不是前端做一遍,然后为了导出这个功能重新做一遍举个例子
/**
   *  公共游戏管理数据
   *  @param { Boolean } isExport 是否导出
   */
  async commonGameEndGameManage(isExport) {
    const activeStatus = { // 这个按道理写在constructor里面哈
      1: '打开',
      2: '关闭',
    }
    const { ctx, app } = this
    const { limit, offset } = this.paginationDeal(ctx.request.query)
    const isPagi = isExport ? {} : { limit, offset }
    const { list, total } = await ctx.service.operateManage.gameEndPage.
    getGameEndGameManage({ isPagi })
    const data = list.map(node => {
      const { status, ...params } = node.toJSON()
      const activeStatus = activeStatus[status]
      return { activeStatus, status, ...params }
    })
    return { list: data, total }
  }
复制代码
2.exportExcel的封装
首先安装对应的包 npm install exceljs --save
然后复制下面的代码就好了
'use strict'
const Service = require('egg').Service
// 引入exceljs
const Excel = require('exceljs')

// 导出文件相关服务
class exportFileService extends Service {
  constructor(prop) {
    super(prop)
    this.defaultViews = [
      {
        x: 0,
        y: 0,
        width: 10000,
        height: 20000,
        firstSheet: 0,
        activeTab: 1,
        visibility: 'visible',
      },
    ]
    this.fontName = 'Arial Unicode MS'
    this.font = { name: this.fontName, family: 4, size: 13 }
    this.fill = { type: 'pattern', pattern: 'solid', fgColor: { argb: 'FF8DB4E2' } }
    this.border = { style: 'thin', color: { argb: 'cccccc' } }
  }
  /**
   * 导出excel
   * @param { Object } config 传入的excel对象
   * @param { Array } config.data excel的数据
   * @param { String } config.filename excel文件名
   * @param { Array } config.header excel的头部
   * @param { String } config.sheetName 表名
   * @param { Array } config.imageKeys 需要转化图片的key
   * @param { String } config.creator 创建表的人
   * @param { String } config.lastModifiedBy 最后修改表的人
   * @param { String } config.imageKeys.imgWidth 图片的宽度
   * @param { String } config.imageKeys.imgHeight 图片的高度
   * */
  async exportExcel({
    data = [],
    filename = 'file',
    header,
    sheetName = 'sheet1',
    imageKeys = [],
    creator = 'me',
    lastModifiedBy = 'her',
  }) {
    const { ctx } = this
    const workbook = new Excel.Workbook()
    // 设置属性 -创建着以及最后修改的人
    workbook.creator = creator
    workbook.lastModifiedBy = lastModifiedBy

    // 时间获取一次就好
    const now = new Date()
    workbook.created = now
    workbook.modified = now
    workbook.lastPrinted = now
    const worksheet = workbook.addWorksheet(sheetName)
    // 设置打开时候的视图-设置位置
    workbook.views = this.defaultViews
    // 使工作表可见
    worksheet.state = 'visible'
    worksheet.columns = header

    for (let i = 1; i <= header.length; i++) {
      worksheet.getColumn(i).alignment = { vertical: 'middle', horizontal: 'center' }
      worksheet.getColumn(i).font = { name: 'Arial Unicode MS' }
    }
    worksheet.addRows(data)
    // 处理图片
    const imageList = this.getImageList(imageKeys, data, header)
    // 添加图片到sheet
    await this.addPicToSheet(imageList, imageKeys, workbook, worksheet)
    // 多级表头
    const headerOPtion = header.filter((item, index) => {
      if (item.type && item.type === 'multi') {
        header.splice(index, 1)
        return item
      }
      return item.type && item.type === 'multi'
    })
    // 多级表头重置设置表头
    if (headerOPtion.length) {
      headerOPtion[0].headerText.forEach((text, index) => {
        const borderAttr = { top: this.border, left:
        this.border, bottom: this.border, right: this.border, index }
        const headerAttr = [
          {
            attr: 'values',
            value: text,
          },
          {
            attr: 'font',
            value: this.font,
          },
          {
            attr: 'fill',
            value: this.fill,
          },
          {
            attr: 'border',
            value: borderAttr,
          },
        ]
        headerAttr.map(item => {
          worksheet.getRow(index + 1)[item.attr] = item.value
          return worksheet
        })
      })
      headerOPtion[0].mergeOption.forEach(merge => {
        worksheet.mergeCells(merge)
      })
    } else {
      // 设置表头样式
      worksheet.getRow(1).font = this.font
      worksheet.getRow(1).fill = this.fill
    }
    const bufferContent = await workbook.xlsx.writeBuffer()

    // 设置
    ctx.set('Content-disposition', `attachment;filename=${filename}.xlsx`)
    // 返回文件buffer
    ctx.body = bufferContent
  }
  // 设置图片大小
  getImageList(imageKeys, data, header) {
    return imageKeys.map(
      key => data.map(
        (item, index) => ({
          key,
          url: item[key.name],
          col: this.app.utils.index.getIndexByKey(header, key.name) + 1,
          row: index + 2,
          width: key.imgWidth,
          height: key.imgHeight,
        })
      )
    )
  }
  // 添加图片到sheet
  async addPicToSheet(imageList, imageKeys, workbook, worksheet) {
    if (imageKeys.length > 0) {
      await Promise.all(imageList.map(async imgArr => {
        return await Promise.all(imgArr.map(item => {
          const { url, width, height, row, col } = item
          // 因为有的图片是不存在的需要判断
          if (url) {
            return this.app.utils.index.getBase64(url, this.ctx).then(res => {
              if (!url) return
              const imgType = url.split('?')[0].substring(url.split('?')[0].
              lastIndexOf('.') + 1).toLowerCase()
              const id = workbook.addImage({
                base64: res,
                extension: imgType,
              })
              worksheet.addImage(id, {
                tl: { col: col - 1, row: row - 1 },
                ext: { width, height },
              })
              worksheet.getRow(row).height = height
              // // 去掉背景链接
              worksheet.getRow(row).getCell(item.key.name).value = ''
            })
          }
          return item
        }))
      }))
    }
  }
}

module.exports = exportFileService
复制代码
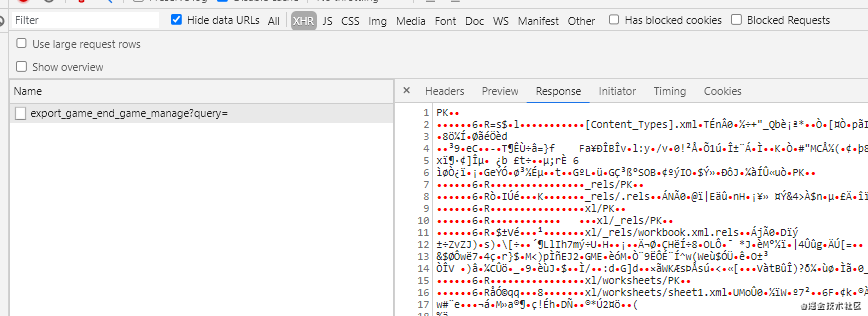
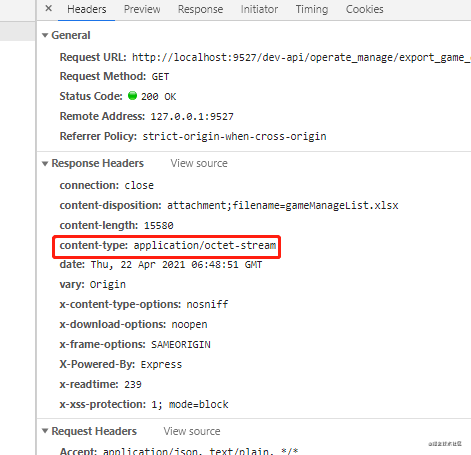
3.调用下载接口后node.js返回的信息
前端看到的就是一个二进制文件流


推荐了解 content-type: application/octet-stream
前端代码
接口
// 文件导出
export function exportFile(url, params) {
  return request({
    responseType: 'blob',
    headers: {
      'Content-Type': 'application/json',
    },
    timeout: 1000 * 60,
    url: url,
    method: 'get',
    params: {
      query: qs.stringify(params),
    },
  })
}
复制代码
utils
/**
 * 本地保存文件并导出
 * @param { Object } Obj 导出文件参数对象
 * @param { Blob } file 文件资源
 * @param { String } fileName 文件名称(注意:包含后缀)
 */
export function loacalSaveFile({ file, fileName, option = { type: 'application/vnd.ms-excel' }}) {
  const ieKit = judgeBrowser('ie')
  const blobData = new Blob([file], option) // 生成 Blob文件
  if (ieKit && navigator.msSaveBlob) {
    navigator.msSaveBlob && navigator.msSaveBlob(blobData, fileName)
  } else {
    // 其他
    const save_link = document.createElement('a')
    const url = URL.createObjectURL(file) // 创建url
    save_link.href = url
    save_link.download = fileName
    document.body.appendChild(save_link)
    save_link.click()
    setTimeout(() => {
      document.body.removeChild(save_link)
      window.URL.revokeObjectURL(url) // 回收url
    }, 0)
  }
}
复制代码
调用
const file = await exportFile(this.exportItem.apiUrl, data)
loacalSaveFile({ file, fileName: `${this.exportItem.fileName}.xlsx` })
复制代码
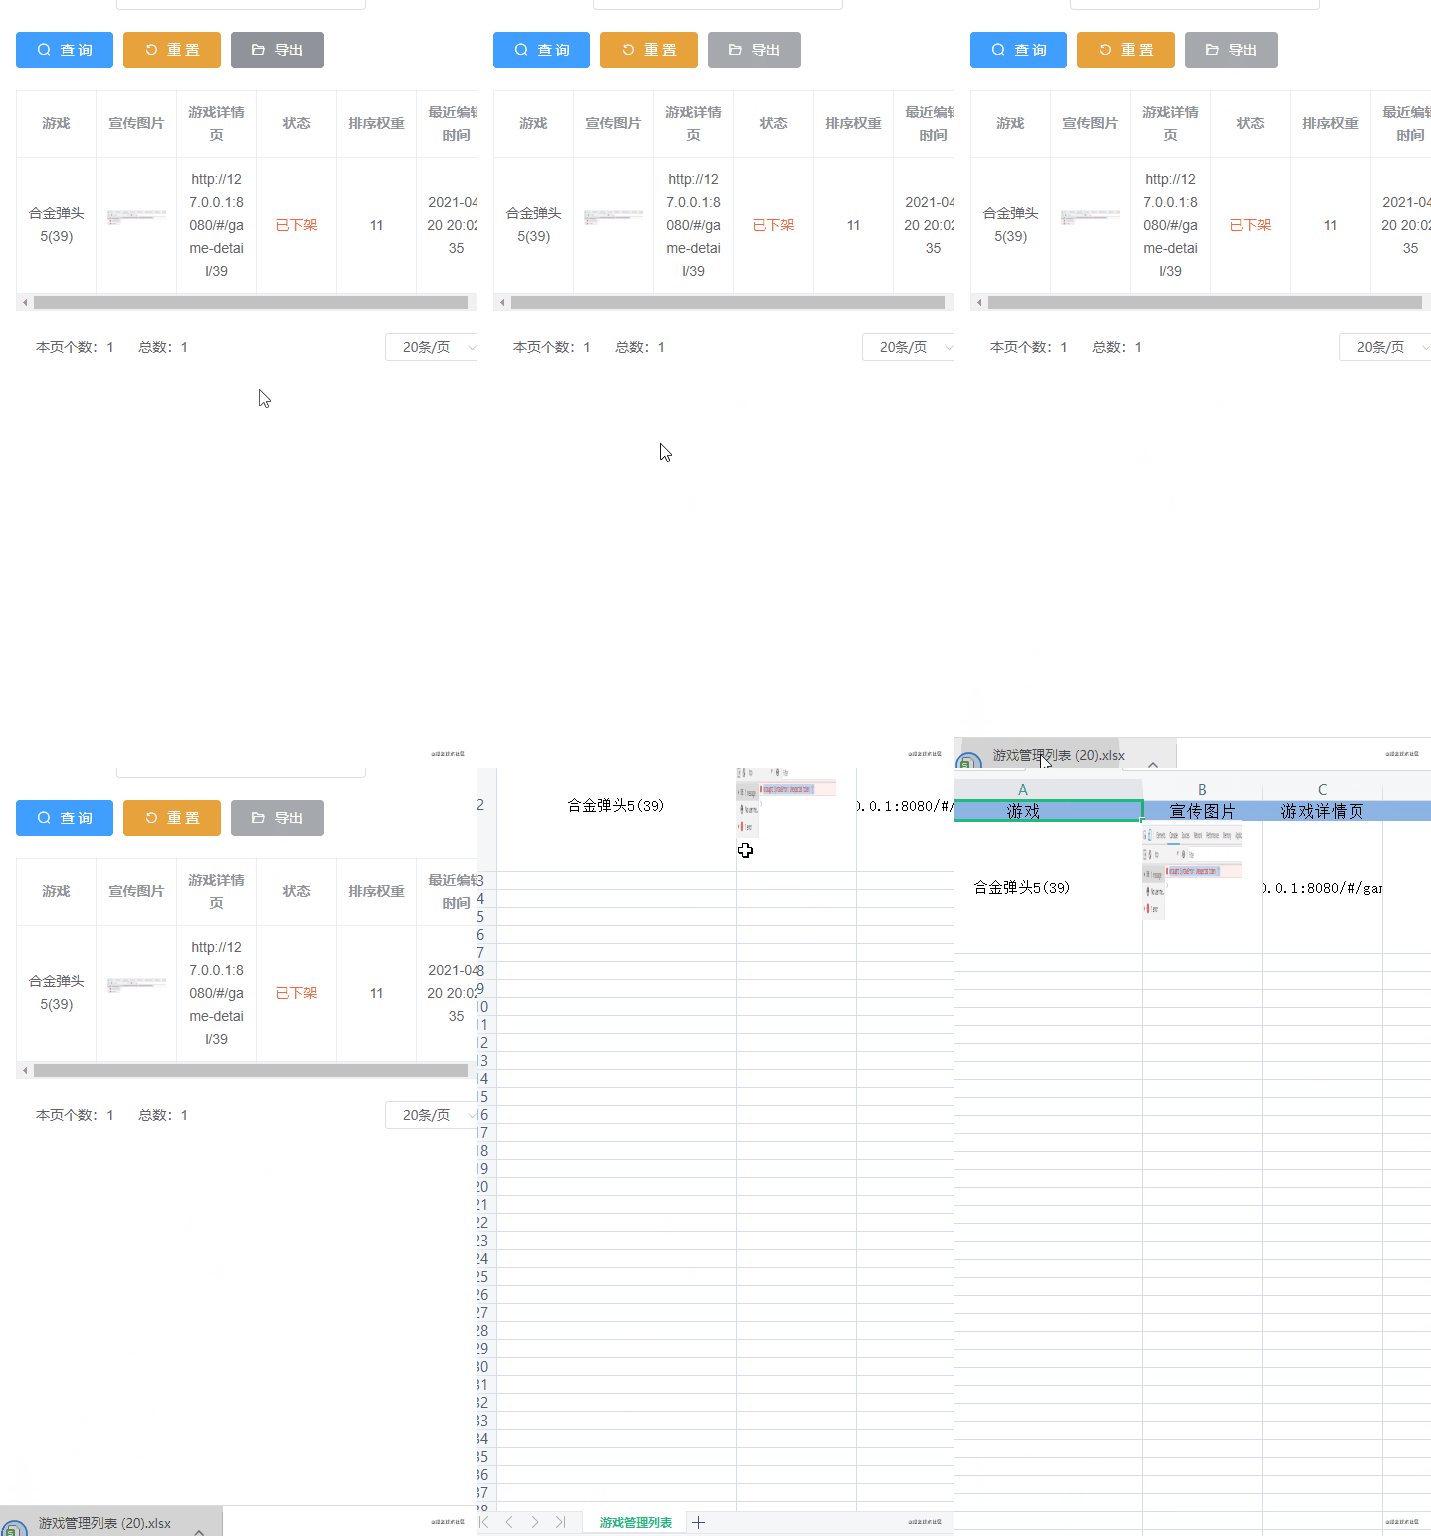
效果

推荐阅读:
React实战之React+Redux实现一个天气预报小项目
最近面试BAT,整理一份面试资料《前端面试BAT通关手册》,覆盖了前端技术、CSS、JavaScript、框架、 数据库、数据结构等等。 获取方式:关注公众号并回复 前端 领取,更多内容陆续奉上。 明天见(。・ω・。)ノ♡

文章评论